A heated and poorly ventilated attic may raise your power costs and possibly damage the material that holds your roof together. Did you know that?
Well, how about installing an attic fan? That is one of the greatest alternatives for saving money while also lowering the temperature of your attic.
So, What Are the Stages?

Step 1: Turn off the power in your attic. And, to turn it off, use the main fuse box or circuit breaker box. Never attempt to install an attic fan on your roof while the power is turned on. It’s also a good idea to turn off any wall switches in the attic.
Step 2: Drill a pilot hole through the roof at the location where you want your fan to be. That way, when you climb up on the roof later, you’ll know exactly where to make the hole. The pilot hole should be located in the middle of the hole. Make sure the hole you’re going to make is centered between two rafters so the fan will fit.
Step 3: Draw a circle on the roof that is the same diameter as your fan. The pilot hole you drilled should be at the circle’s center. Check the manufacturer’s specs or use a tape measure to determine the diameter of your fan. Then, climb to the roof and use a piece of chalk to draw a circle around the pilot hole.
- When working on the roof, use a hard helmet and footwear with adequate traction.
- Make sure that someone accompanies you on the roof in case you require assistance for any task.
- If your roof is damp, don’t get on it since you could slide.
Step 4: Using a reciprocating saw, cut off the circular. A reciprocating saw is a portable electric saw with a blade that cuts into and out of a surface quickly. As a starting point for the saw, use the pilot hole you drilled previously. Continue to cut along the line you drew with the saw until the hole is complete. Remove the cut-out portion of the wall or roofing from the hole and discard it.
Step 5: Using a pry bar, loosen the shingles surrounding the hole. You must remove the shingles in order to slip the attic fan’s flange (the flat rim that extends from the body of the fan) between the shingles and the roof underneath them. Remove any nails or staples that you come across when loosening the shingles with the pry bar.
- Simply pry open the two corners closest to the opening on each shingle. Don’t remove all of the shingles.
Step 6: Slide the attic fan over the hole, making sure the flange is beneath the shingles. Place the fan flat on the roof, right below the hole, and slowly move it up. The flange should glide underneath the shingles you loosened as you slide it up. Only the flange’s bottom two corners should be visible. When you’re done, the center of the fan should be right above the hole you made.
- The fan’s open vent should face down into your attic, and the fan’s closed off top should face up.
Step 7: Drill the lowest two corners of the flange into the roof. Two screw holes should be positioned on the bottom corners of the fan’s flange. The attic fan will be secured to your roof by screwing the flange down. Before screwing it down, make sure the bottom edge of the flange is square with the shingles.
Step 8: Using roofing adhesive, reattach the shingles you unfastened. Roofing adhesives are thick, glue-like compounds that may be used to hold objects together. Loosen the shingles and put a large amount of roofing glue between the shingles and the fan’s flange. To reconnect the shingles to the roof, push them firmly into the adhesive.
- To prevent the screws on the flange from water damage, put a dab of roofing glue over them.
- A roofing adhesive may be purchased online or at your local home improvement store.
Step 9: Install the fan thermostat on a neighboring rafter in your attic. The thermostat is the unit that will allow you to regulate the attic fan. When you’re back in your attic, find a rafter near your fan and screw the thermostat onto it with the screws that came with the fan.
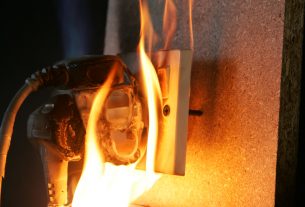
Step 10: To wire your attic fan, follow the manufacturer’s instructions. Look up your local electrical codes online, and plan on having your wiring examined by a codes official after you’re completed. Wiring your attic fan on your own might be dangerous and lead to serious harm. If you’re not sure how to wire an attic fan, get a professional electrician to install it for you.


