How to Insulate Walls from the Outside
In this comprehensive guide, we will walk you through the process of insulating your walls from the outside, providing you with valuable information to improve the energy efficiency and comfort of your home. By following these steps, you can enhance the insulation of your walls, reduce heat loss, and potentially save on energy costs. So let’s dive in and learn how to insulate walls from the outside!
Step 1: Assess Your Walls

Begin by thoroughly assessing the condition of your walls. Look for signs of gaps, cracks, or deteriorated insulation. Pay attention to areas where drafts are commonly felt or where temperature differences are noticeable. Identifying these areas will help you determine the extent of insulation needed.
Step 2: Choose the Right Insulation Material
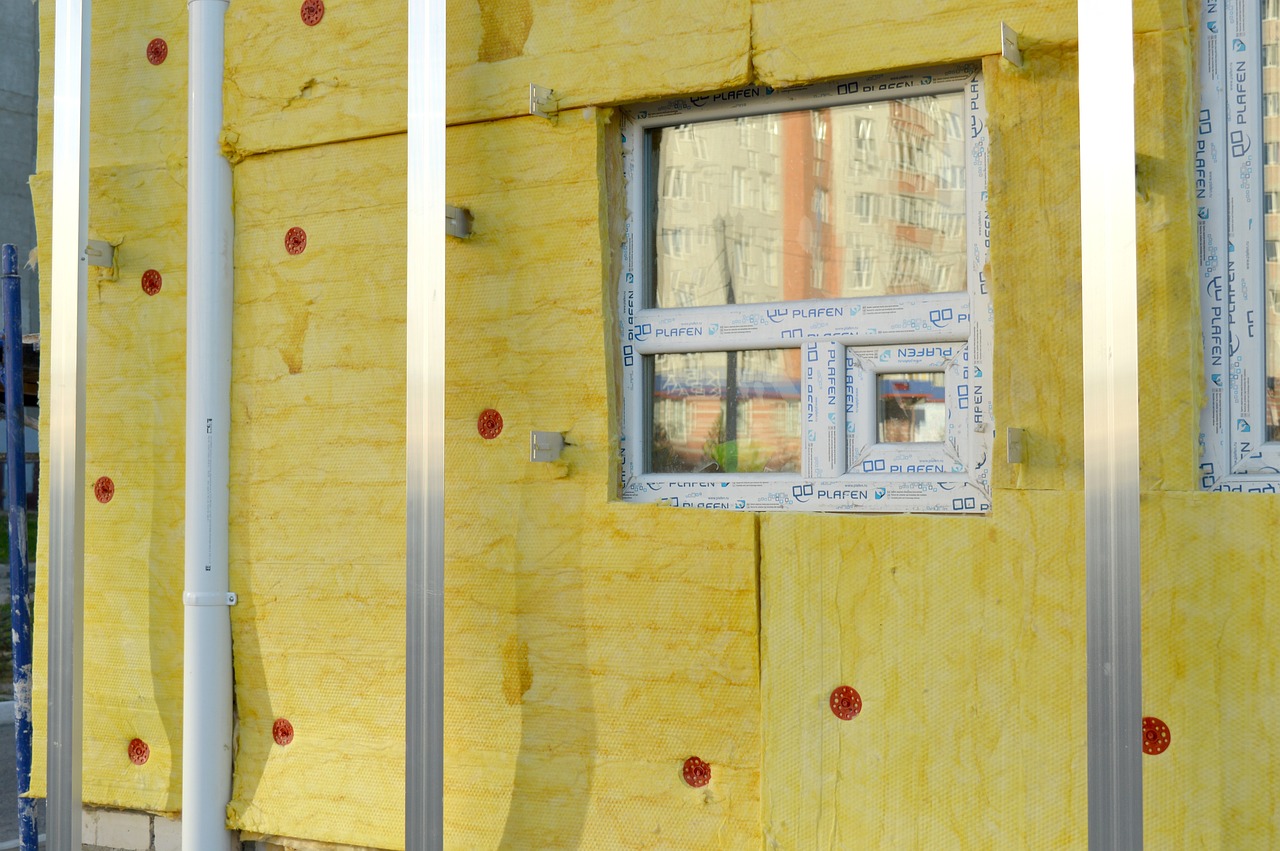
Selecting the appropriate insulation material is crucial for achieving effective insulation. Consider factors such as the R-value (thermal resistance), moisture resistance, durability, and suitability for exterior applications. Common options include rigid foam boards, mineral wool, fibreglass batts, and spray foam insulation. Research the pros and cons of each material to make an informed decision.
Step 3: Prepare the Exterior Walls
Before installing insulation, it’s essential to prepare the exterior walls properly. Start by cleaning the walls thoroughly, removing any dirt, debris, or loose paint. Repair any damages or cracks using suitable materials to ensure a smooth surface for insulation installation. This step is crucial as it helps create a solid foundation for the insulation.
Step 4: Install Vapor Barrier (If Needed)
Depending on your climate and local building codes, you may need to install a vapour barrier to prevent moisture buildup within the wall cavity. A vapour barrier helps protect the insulation from moisture damage and keeps the wall assembly dry. Follow the manufacturer’s instructions to properly install the vapour barrier, ensuring it covers the entire insulated area.
Step 5: Cut and Fit Insulation Panels
Measure and cut the insulation panels according to the dimensions of your walls. Take precise measurements to minimize gaps and ensure a snug fit. Fit the panels tightly into place, making sure they cover the entire wall surface. Use adhesive or mechanical fasteners, as recommended by the manufacturer, to secure the insulation panels firmly.
Step 6: Seal Joints and Gaps
To maximize the insulation’s effectiveness, it’s crucial to seal any joints, gaps, or penetrations. Air leakage through these areas can significantly impact the insulation’s performance. Use an appropriate sealant or caulk to seal all openings, including around windows, doors, electrical outlets, and pipes. This step will help create an airtight barrier and prevent heat loss.
Step 7: Install Siding or Cladding

After the insulation is in place, it’s time to install siding or cladding to protect the insulation and provide an aesthetically pleasing finish. Choose a suitable material that complements your home’s architecture and climate conditions. Common options include vinyl siding, fibre cement siding, wood siding, or brick veneer. Follow the manufacturer’s guidelines for proper installation, ensuring proper overlap and secure attachment.
Step 8: Regular Maintenance and Inspection
Once the insulation is installed, it’s important to perform regular maintenance and inspections to ensure its long-term effectiveness. Check for any signs of damage, moisture buildup, or pests that may affect the insulation’s performance. Address any issues promptly to maintain the efficiency of your insulation. Additionally, consider scheduling professional inspections every few years to assess the insulation’s condition and make any necessary repairs or upgrades.
By following this comprehensive step-by-step guide, you can effectively insulate your walls from the outside and improve the energy efficiency and comfort of your home. Remember to assess your walls, choose the right insulation material, properly prepare the exterior walls, and ensure precise installation and sealing. Insulating your walls not only reduces energy consumption and costs but also creates a more comfortable living environment. Take action now and enjoy the benefits of a well-insulated home for years to come.


